Today We will cover how you can create Custom Indexer
First of all you need to create custom module. If you don’t know how to create custom module then you can check out previous tutorial
Now create indexer.xml and write below code
<indexer id="mageacademy_indexerexample_indexer" view_id="mageacademy_indexerexample_indexer" class="MageAcademy\IndexerExample\Model\Indexer\CustomIndex">
        <title translate="true">MageAcademy IndexerExample Indexer</title>
        <description translate="true">My Custom Indexer</description>
    </indexer>
id : Unique Indexer Id
class : The class that processes indexer methods
view_id : The ID of the view element that is defined in the mview.xml configuration file.
Now create mview.xml
<view id="mageacademy_indexerexample_indexer" class="MageAcademy\IndexerExample\Model\Indexer\CustomIndex" group="indexer">
        <subscriptions>
            <table name="sales_order" entity_column="entity_id" />
        </subscriptions>
    </view>
Now create CustomIndex
<?php
namespace MageAcademy\IndexerExample\Model\Indexer;

class CustomIndex implements \Magento\Framework\Indexer\ActionInterface, \Magento\Framework\Mview\ActionInterface
{
    /*
     * Used by mview, allows process indexer in the "Update on schedule" mode
     */
    public function execute($ids){

        //code here!
    }

    /*
     * Will take all of the data and reindex
     * Will run when reindex via command line
     */
    public function executeFull(){
        //code here!
    }


    /*
     * Works with a set of entity changed (may be massaction)
     */
    public function executeList(array $ids){
        //code here!
    }


    /*
     * Works in runtime for a single entity using plugins
     */
    public function executeRow($id){
        //code here!
    }
}
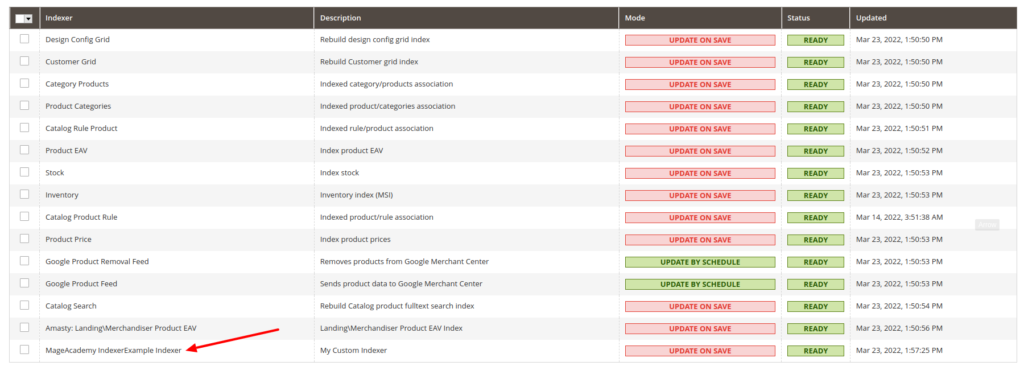
After this enable the module and flush the cache , so you will see your custom indexer as below